Welcome to the Canon A-1 instruction manual‚ your comprehensive guide to mastering this iconic SLR camera‚ produced from 1978 to 1985. This manual provides detailed instructions for optimal use‚ ensuring you unlock the camera’s full potential with precise control over aperture‚ shutter speed‚ and flash photography. By following these steps‚ you’ll gain proficiency in both automatic and manual modes‚ enabling you to capture stunning images with ease and creativity.
1.1 Overview of the Canon A-1 Camera
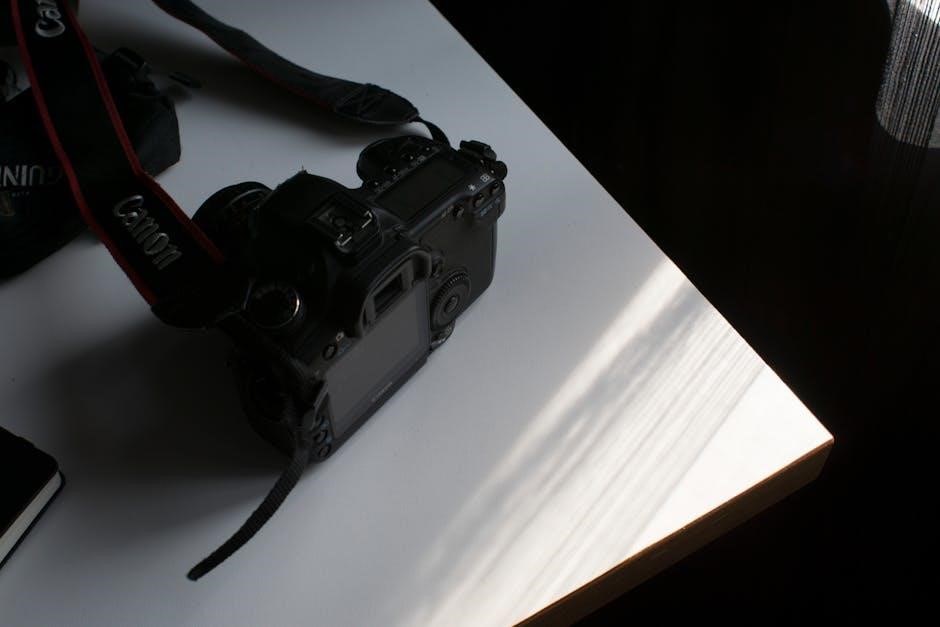
The Canon A-1‚ produced from 1978 to 1985‚ is a highly regarded 35mm SLR camera known for its advanced features and versatility. It offers both automatic and manual modes‚ catering to photographers of all skill levels. The camera features a wide range of shutter speeds‚ aperture control‚ and flash compatibility‚ making it ideal for various lighting conditions. Its durable design and intuitive controls have made it a favorite among photography enthusiasts. This overview highlights the camera’s key features and capabilities‚ providing a foundation for understanding its operation and potential.
1.2 Importance of Reading the Instruction Manual
Reading the Canon A-1 instruction manual is essential for understanding its advanced features and ensuring optimal performance. The manual provides detailed guidance on camera setup‚ operation‚ and troubleshooting‚ helping you master both automatic and manual modes. It explains key functions like aperture control‚ shutter speed adjustment‚ and flash photography‚ while also covering maintenance tips for longevity. By carefully following the manual‚ you can unlock the camera’s full potential‚ avoid common mistakes‚ and achieve professional-quality results. This comprehensive guide is your roadmap to harnessing the A-1’s capabilities and capturing exceptional photographs with precision and creativity.
Camera Components and Nomenclature
The Canon A-1 camera features a range of components‚ including the lens‚ viewfinder‚ shutter‚ and aperture controls. Familiarizing yourself with these parts is essential for effective operation.
2.1 Front and Back Nomenclature Pages
Fold out the front and back nomenclature pages for easy reference while reading the instructions. These pages provide clear labels and diagrams of all camera components‚ ensuring quick identification of buttons‚ dials‚ and other features. Understanding these parts is crucial for maximizing the camera’s functionality. The diagrams highlight key elements such as the lens mount‚ shutter release‚ and mode dials‚ making it easier to navigate the camera’s controls. Refer to these pages frequently as you explore the Canon A-1’s features and settings to enhance your photography experience effectively.
2.2 Key Camera Parts and Their Functions
The Canon A-1 features essential components designed for precise control. The lens focuses and regulates light entry‚ while the aperture ring adjusts f-stops for depth of field. The shutter release button captures images‚ and the mode dial selects shooting modes. The ASA dial sets film sensitivity‚ ensuring optimal exposure. The viewfinder displays framing and settings‚ aiding composition. Each part is engineered for intuitive operation‚ allowing photographers to achieve creative and technical excellence effortlessly. Understanding these elements is vital for mastering the camera’s capabilities and producing exceptional results in various photographic scenarios.

Loading Film and Basic Setup
Begin by installing the battery and turning the main switch to the “A” position. Load the film‚ ensuring it aligns correctly‚ and advance it to the first frame.
3.1 Loading the Battery
To power your Canon A-1‚ open the battery compartment located on the bottom of the camera. Insert a 4LR44 or equivalent 6V battery‚ ensuring the polarity matches the diagram inside the compartment. Close the compartment securely. Turn the main switch to the “A” position to activate the camera. Verify the battery status by checking the viewfinder or external indicators. For optimal performance‚ use fresh batteries and avoid mixing old or used ones. If unsure‚ refer to the manual or use a battery checker to confirm proper installation. Proper battery loading ensures reliable operation for film loading and camera setup.
3.2 Turning the Main Switch to the A Position
After loading the battery‚ locate the main switch on the top right of the Canon A-1. Firmly turn the switch to the “A” position to activate the camera’s electronic functions. This action powers up the metering system‚ enabling aperture priority and manual modes. Ensure the switch is fully engaged to avoid partial activation. Turning the switch to “A” prepares the camera for film loading and shooting. Always confirm the switch is in the correct position before proceeding with other operations to ensure proper camera functionality and accurate exposure readings. This step is crucial for initializing the camera’s advanced features.
3.3 Loading and Advancing Film
To load film into the Canon A-1‚ open the camera back by pulling the rewind knob. Insert the film cartridge‚ ensuring it is properly seated. Pull the film leader and insert it into the take-up spool‚ making sure it aligns correctly. Close the camera back firmly. Advance the film by turning the rewind knob until it stops‚ indicating the first frame is ready; Check the film counter to confirm it displays “1.” Repeat advancing if necessary. Always avoid exposing the film to light during loading. After loading‚ rewind the film completely before removing it to prevent light exposure and damage to your photos.
Setting the ASA Film Speed
Pull the ASA dial and rotate it to match your film’s speed. Ensure the correct setting for proper exposure. This step is crucial for accurate light metering.
4.1 Understanding Film Speed Settings
Film speed‚ measured by the ASA rating‚ determines light sensitivity. Lower ASA values (e.g.‚ 50 or 100) are ideal for bright conditions‚ offering finer grain and sharp images. Higher ASA values (e.g.‚ 400 or 800) suit low-light situations but may result in grainier photos. Matching the ASA setting to your film ensures proper exposure‚ allowing the camera’s metering system to calculate accurate aperture and shutter speed combinations; This balance is essential for achieving optimal results in various lighting environments‚ making it a fundamental step in using the Canon A-1 effectively.
4.2 Adjusting the ASA Dial
To adjust the ASA dial on your Canon A-1‚ start by locating the dial‚ typically found near the lens or on the top right of the camera. Press and hold the button on the dial while rotating it to your desired film speed‚ ensuring it matches the film loaded. This setting is crucial for accurate exposure‚ as it informs the camera’s metering system. Proper alignment ensures optimal aperture and shutter speed calculations‚ helping you achieve well-exposed photographs in various lighting conditions. Always double-check the ASA setting before shooting to avoid under or overexposure. This step is vital for mastering the Canon A-1’s functionality and capturing high-quality images consistently.

Aperture and Shutter Speed Settings
Set the aperture ring to the A mark for automatic exposure or manually adjust it for creative control. Adjust shutter speed using the dial near the release button. This combination allows precise control over exposure‚ enabling photographers to achieve desired effects in various lighting conditions. Ensure proper alignment of the aperture ring for accurate metering. This feature provides flexibility for both automatic and manual photography‚ making the Canon A-1 versatile for different shooting scenarios. Always check settings before capturing images for optimal results. This step is essential for mastering exposure control and producing high-quality photographs. The camera’s design makes it easy to toggle between modes‚ offering photographers the freedom to experiment with artistic techniques. By understanding aperture and shutter speed settings‚ users can unlock the full potential of the Canon A-1‚ ensuring every shot is perfectly framed and exposed. This section guides you through the process‚ helping you make the most of the camera’s advanced features. With practice‚ you’ll effortlessly balance aperture and shutter speed for stunning results. The Canon A-1’s intuitive controls make it accessible for both beginners and experienced photographers. Explore the possibilities of manual and automatic modes to enhance your photography skills. This manual will walk you through each setting‚ ensuring you’re confident in your ability to use the camera effectively. Whether you’re capturing landscapes‚ portraits‚ or action shots‚ proper aperture and shutter speed settings are key to success. The Canon A-1’s robust design and user-friendly interface make it a timeless tool for photographers of all levels. By mastering these settings‚ you’ll be able to adapt to any shooting environment and achieve professional-quality results. The combination of automatic and manual controls offers unparalleled flexibility‚ making the Canon A-1 a favorite among photography enthusiasts. This section provides a detailed guide to help you understand and utilize aperture and shutter speed settings to their fullest potential. With the Canon A-1‚ you have the power to create exceptional images that reflect your unique vision and style. Take the time to familiarize yourself with these controls‚ and you’ll be ready to capture life’s precious moments with precision and artistry. The Canon A-1’s legacy lies in its ability to empower photographers to produce outstanding work‚ and this section is your key to unlocking that power. By following the instructions and practicing regularly‚ you’ll become proficient in using aperture and shutter speed settings to enhance your photography. The Canon A-1 is more than a camera; it’s a creative partner that helps you bring your vision to life. Embrace its capabilities‚ and you’ll never miss an opportunity to capture the perfect shot. This manual is your guide to harnessing the full potential of the Canon A-1‚ ensuring every photograph you take is a masterpiece.
5.1 Setting the Aperture Ring to the A Mark
To enable automatic exposure mode‚ set the aperture ring to the A mark. Locate the A mark on the lens aperture ring and align it with the indexing mark. Ensure the ring is fully engaged for accurate metering. This setting allows the camera to automatically adjust aperture for proper exposure. When in A mode‚ the camera prioritizes aperture for optimal results. Always confirm the ring is securely set to avoid manual override. This feature simplifies photography‚ allowing you to focus on composition while the camera handles exposure. Proper alignment ensures precise control and consistent results.
5.2 Adjusting Shutter Speed
Adjusting the shutter speed on the Canon A-1 is crucial for controlling exposure and achieving desired effects. The shutter speed dial‚ located on the camera’s top‚ offers speeds from 1/2 to 1/1000 of a second‚ plus a Bulb (B) setting for long exposures. To set the speed‚ rotate the dial until the desired marker aligns with the index. Faster speeds (e.g.‚ 1/500) are ideal for bright light and freezing motion‚ while slower speeds (e.g.‚ 1/30) are suitable for low light and creating motion blur. Use the B setting for artistic effects like star trails. Match your speed with the lighting conditions for optimal results‚ ensuring sharp images in various scenarios.

Metering Modes and Exposure Control
The Canon A-1 features Center-Weighted Average Metering for balanced exposures. Manual override allows precise adjustments‚ enabling photographers to achieve creative control over lighting and image results effectively.
6.1 Understanding Metering Modes
The Canon A-1 utilizes a Center-Weighted Average Metering system‚ which measures light from the entire frame‚ emphasizing the central area for balanced exposures. This mode is ideal for most shooting scenarios‚ providing consistent results by averaging light intensity across the scene. It prioritizes the center‚ where subjects often reside‚ ensuring proper exposure for your main focus. The camera also supports manual override‚ allowing photographers to adjust settings for creative control. Understanding metering modes is crucial for optimizing image quality and achieving desired effects in various lighting conditions.
6.2 Manual Override for Exposure Correction
The Canon A-1 allows photographers to take creative control by manually overriding automatic exposure settings. To enable manual override‚ disengage the lens aperture ring from the “A” mark. This feature grants flexibility for adjusting shutter speed or aperture to achieve specific effects or compensate for challenging lighting conditions‚ such as backlighting. Manual override is particularly useful for advanced photographers seeking precise control over their images. By understanding how to use this feature‚ you can refine your technique and produce photos that match your artistic vision‚ ensuring optimal exposure in various shooting scenarios.
Flash Photography
The Canon A-1 offers versatile flash photography options‚ enhanced by compatibility with the Speedlite 199A‚ which is synchronized with the camera’s aperture and shutter speed settings for precise exposures.
7.1 Flash Ready Information
Flash ready information is displayed in the viewfinder‚ ensuring you’re informed when the flash is prepared for use. A flashing signal indicates the Speedlite is charging‚ while a steady light confirms it’s ready to fire. This feature helps prevent missed shots due to improper flash synchronization. Additionally‚ the manual provides detailed instructions on how to interpret these signals‚ ensuring optimal flash performance in various lighting conditions. This system enhances reliability‚ making flash photography intuitive and effective with the Canon A-1.
7.2 Using the Speedlite 199A
The Speedlite 199A is a powerful flash unit designed for the Canon A-1‚ offering enhanced flash photography capabilities. Compatible with the camera’s hot shoe‚ it provides automatic and manual flash control‚ ensuring precise illumination. The Speedlite 199A integrates seamlessly with the A-1’s exposure system‚ delivering balanced flash results. Its versatility allows for bounce flash and other creative lighting techniques. For detailed setup and operation‚ refer to the Speedlite 199A’s instruction booklet‚ which provides comprehensive guidance on maximizing its features for professional-grade photography.

Viewfinder Displays and Indicators
The Canon A-1’s viewfinder displays essential shooting information‚ including aperture‚ shutter speed‚ and flash readiness. These indicators help ensure accurate exposure and provide real-time camera status updates.
8.1 Manual Indication and Flashing Signals
The Canon A-1 features a viewfinder with manual indication and flashing signals to guide photographers. These indicators help monitor exposure settings and flash readiness. When manual mode is engaged‚ the viewfinder displays aperture and shutter speed settings. Flashing signals alert users to potential overexposure or improper settings‚ ensuring adjustments can be made before capturing images. These visual cues are essential for precise control‚ allowing photographers to achieve desired results efficiently. Proper interpretation of these signals enhances shooting accuracy and overall camera performance. Always refer to the manual for detailed explanations of each indicator’s function and application.
8.2 Digital Display Information
The Canon A-1’s digital display provides essential information to streamline your photography workflow. Located in the viewfinder‚ this display shows aperture‚ shutter speed‚ and flash readiness. It offers a quick reference for exposure settings‚ ensuring precise control. The digital display also indicates manual mode activation‚ allowing photographers to adjust settings with confidence. This feature enhances accuracy and efficiency‚ making it easier to achieve optimal results. By monitoring the digital display‚ users can make informed decisions‚ ensuring each shot is perfectly framed and exposed. This tool is indispensable for mastering the camera’s capabilities effectively.
Advanced Features and Accessories
The Canon A-1 supports advanced features like the Motor Drive for rapid shooting and the Speedlite 199A flash for enhanced lighting control‚ expanding creative possibilities.
9.1 Motor Drive Compatibility
The Canon A-1 is compatible with the Motor Drive MA‚ enhancing shooting speed and convenience. This accessory enables continuous shooting at up to 5 frames per second‚ making it ideal for action photography. The Motor Drive MA simplifies film advancement‚ allowing photographers to focus on composition and timing. It operates on four AA batteries‚ ensuring reliable performance in various conditions. For sports or wildlife photography‚ the Motor Drive MA is an essential accessory‚ offering faster operation and minimizing manual intervention. Refer to the manual for detailed installation and usage instructions to maximize its functionality with your Canon A-1 camera.
9.2 Using the Data Back
The Canon A-1 Data Back is an optional accessory that allows photographers to imprint date and time information directly onto their film. This feature is particularly useful for organizing and dating photos. To use the Data Back‚ simply mount it on the camera’s back. It requires a lithium battery (CR1025) to operate. The Data Back offers an ON/OFF switch‚ enabling photographers to choose when to imprint data. The date and time are set using a small control on the back. This accessory is ideal for professionals or enthusiasts needing to track when images were captured‚ providing a permanent record on the film.
Troubleshooting Common Issues
Identify common issues like shutter malfunctions‚ aperture errors‚ or flash problems. Refer to troubleshooting sections for repair guidance‚ ensuring proper cleaning and battery maintenance for optimal performance.
10.1 Resolving Shutter and Aperture Malfunctions
Shutter and aperture malfunctions can disrupt your photography. Start by ensuring the battery is fully charged‚ as low power may cause erratic behavior. Clean the camera thoroughly‚ paying attention to the lens and aperture blades‚ to remove dirt or debris that might interfere with movement. If the shutter fails to open or close properly‚ check for obstructions or misalignments; For aperture issues‚ ensure the aperture ring is set correctly and not stuck. If problems persist‚ consult the repair guide or contact a professional technician for assistance. Regular maintenance is key to preventing such malfunctions.
10.2 Fixing Flash and Metering Problems
If the flash fails to fire‚ ensure the battery is charged and the Speedlite 199A is properly attached. Check for loose connections or debris in the hot shoe. For metering issues‚ clean the light meter window to ensure accurate readings. If exposure is inconsistent‚ verify the ASA film speed setting matches your film. Refer to the Speedlite 199A manual for troubleshooting specific flash malfunctions. If problems persist‚ check the digital display for error signals and consult the repair guide or contact a professional technician. Regularly cleaning and maintaining these components will help prevent such issues.

Maintenance and Care Tips
Regularly clean the camera and lens with a soft cloth to prevent dust buildup. Store the Canon A-1 in a dry‚ cool place to avoid moisture damage. After use‚ ensure all components are free from debris and properly secured. This maintenance ensures optimal performance and extends the camera’s lifespan.
11.1 Cleaning the Camera and Lens
Regular cleaning is essential to maintain the Canon A-1’s performance. Use a soft‚ dry cloth to wipe the camera body and external components‚ avoiding harsh chemicals. For the lens‚ gently remove smudges with a microfiber cloth or lens tissue. Avoid touching the lens surface to prevent oil residue. Use an anti-static brush to clean the viewfinder and mirror box. Never apply cleaning solutions directly to the lens or camera body‚ as this may damage protective coatings. Proper cleaning ensures sharp images and prevents dust from affecting your photography. Always store cleaning tools in a dry place to maintain their effectiveness.
11.2 Storing the Camera Properly
Proper storage is crucial to preserve the Canon A-1’s condition and functionality. Store the camera in a cool‚ dry place‚ away from direct sunlight and moisture. Use a protective case or silica gel packets to prevent humidity damage. Avoid extreme temperatures‚ as they may affect the camera’s internal mechanisms. When not in use‚ keep the lens capped and the camera body clean. Store batteries separately to prevent corrosion. Regularly inspect stored items to ensure no damage occurs over time. Proper storage ensures your Canon A-1 remains in excellent condition for years of reliable use.
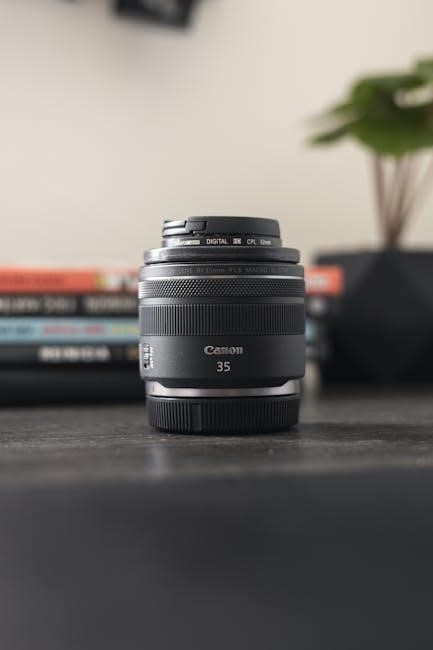
Table of Contents
The table of contents provides a quick reference guide to all main sections and subsections of the Canon A-1 manual‚ ensuring easy navigation through the comprehensive instructions.
- Camera Components and Nomenclature
- Loading Film and Basic Setup
- Setting the ASA Film Speed
- Aperture and Shutter Speed Settings
- Metering Modes and Exposure Control
- Flash Photography
- Viewfinder Displays and Indicators
- Advanced Features and Accessories
- Troubleshooting Common Issues
- Maintenance and Care Tips
- Table of Contents
12.1 Main Features and Reference Guide
This section highlights the Canon A-1’s key features and provides a reference guide for quick access to essential information. The A-1‚ produced from 1978 to 1985‚ is renowned for its advanced aperture and shutter control‚ offering both automatic and manual modes. It supports FD-mount lenses‚ ASA film speeds from 12 to 3200‚ and features metering modes for precise exposure control. Accessories like the Speedlite 199A flash and motor drives enhance its versatility. This guide ensures users can easily navigate and master the camera’s capabilities‚ making it a valuable resource for photographers of all skill levels.
This concludes the Canon A-1 manual‚ a comprehensive guide to mastering this iconic SLR camera. By following these instructions‚ you’ll unlock its full creative potential and capture stunning images with precision and ease.
13.1 Final Tips for Mastering the Canon A-1
To fully master the Canon A-1‚ practice regularly and experiment with different modes. Always clean and maintain the camera to ensure optimal performance. Familiarize yourself with the metering modes and manual overrides for precise control in various lighting conditions. Use accessories like the Speedlite 199A for enhanced flash photography and explore the Motor Drive for faster shooting. Keep the manual handy for quick reference and troubleshooting. With time and practice‚ you’ll unlock the A-1’s full potential‚ capturing stunning images with ease and confidence.